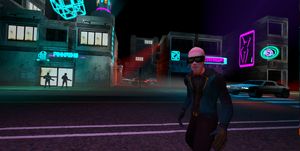
Building Ajax: The simple and effective technique I used to create character textures in The Flight of Ajax
Dec 6, 2022
More in this series
- Building Ajax: The simple and effective technique I used to create character textures in The Flight of Ajax
Texturing game characters can be a long process, often with many iterations. Particularly if you are going for high-fidelity high detail models with multiple textures for a PBR workflow. However, for “The Flight of Ajax'' I am going for a low poly stylized character in the style of the PlayStation 1, the low fidelity unfiltered textures add to the gritty aesthetic that the game is trying to imbue. The following techniques allow me to create great textures quickly and easily. It can even make for a good base to do more detailed texture work.
Software for creating PlayStation-style character textures
I use only free and open-source software to create “The Flight of Ajax”. For the texturing process, I use GIMP for image manipulation and Blender for texture mapping and 3D modelling.
Creating a rough texture for the character using photo bashing
Photobashing is a digital concept art technique where various photos and digital painting elements are combined together to form a single artwork. Although this step is not technically photo bashing it is borrowing the concept and applying it to creating a texture.
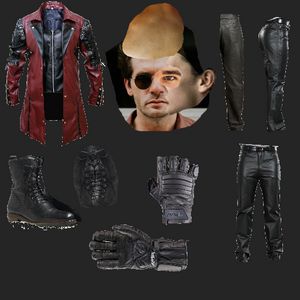
“The Flight of Ajax” is a cyberpunk game set in a post-apocalyptic neon dystopia. So I need to find some images and references that convey this feeling. Using Google I search for a bunch of reference images that fit the aesthetic I am going for. I take a very free approach to this step, the pictures don’t need to be perfectly colour-coordinated or even matching resolutions at this stage.
I copy-paste my reference images into a blank GIMP file. I make the file fairly large to fit as many reference images as possible. I opted for 2048x2048.
Later I am going to use a technique called texture baking to optimize the texture so at this stage I keep things very rough.
UV unwrapping a model for texturing in Blender
UV unwrapping is the process of flattening a 3D model into a 2D representation so that a 2D texture can be applied to it. It allows us to choose areas of our texture to apply to parts of the model.
In Blender, I open my character model. As I am going for a Playstation 1 aesthetic I am using a basic low poly model.
The first step is to create a material for the model. A material is a skin that wraps around a 3D model and can control many aspects of how the model will look when rendered in-the game. A texture is a property of this material and in my case controls the colour or Albedo of the model.
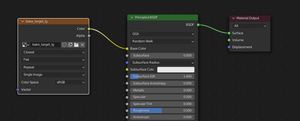
In Blender in the shader tab I create a new material and added the following nodes:
- Texture > Image Texture
- Shader > Principle BSDF
- Output > Material Output
Connect the image texture colour connector to the base colour connector on the principle BSDF. and the BSDF to the surface of Material Output. I turn the Specular setting down to avoid distracting shininess while I work.
I then click the folder icon on the Image Texture and select my reference image from the file system.
My nodes now look like this.
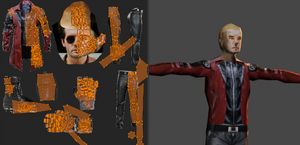
Switching over to the UV tab I start unwrapping my model. Selecting the faces I want to texture, I press U and unwrap. Then in the UV editor, I drag the unwrapped faces over the image to the area I want to be applied to that face.
After this process I ended up with a rough patchwork version of my texture:
How to bake a UV texture in Blender
UV baking is the process of taking a texture applied to a model and applying it to a new more optimised texture map which can then be saved as a new image. The original UV map doesn’t make the best use of the image space. It is also hard to edit and make other adjustments. After this step, I will have a well-laid-out UV of my character's texture.
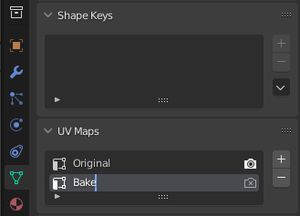
In the UV tab, I select the object data properties and expand the UVMap dropdown. I like to name the current map original. Click the plus icon to create a new UV map and name this one Bake.
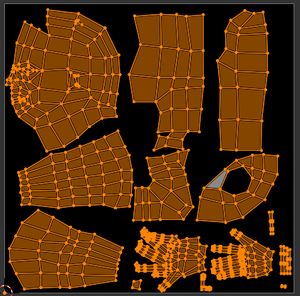
I create a new image on the UV screen and unwrap my model into a nice layout such as the one below. To do this I needed to create some seams on my model. However, this can also work using smart UV projection. Note how this layout makes much better use of the image space.
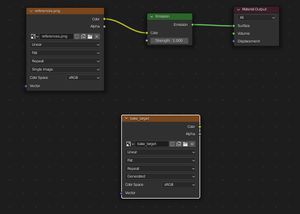
Back in the Shading tab I add an emission shader node and hook up the colour output of the reference image to the colour input of the Emission shader node. Then I connect the emission output to the material output node. I Create a new image texture node and select the newly created image as the bake target. This node needs to be highlighted and selected for the bake to work.
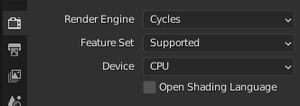
The Eevee renderer doesn’t have bake options so In the render properties tool, I select the cycles render engine.
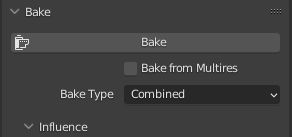
Then scrolling down I expand Bake and click the bake button. This takes a moment or so to complete.
If all went well you should now have an image something like the one below. If not make check the following:
- Under UV maps the bake is selected but the original is visible (camera icon)
- In the Shading tab, the target image is selected in the node layout
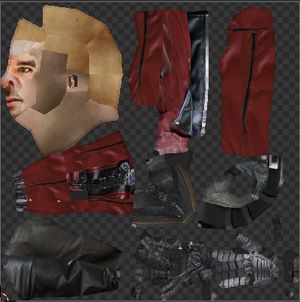
We can now set up our nodes with a principle BSDV as before but using the newly baked image as our input texture.
Using GIMP to Tidy up the image and correct sharp edges and colours.
I Bring this newly created texture into gimp and duplicate the main image onto a new layer to avoid ruining my original bake. I like to transform the image to grayscale and recolour it later. This makes it easier to clean up rough edges without worrying about mixing colours up into a lovely mess. I do this by selecting the new layer, clicking Colors in the top menu, and in the drop-down selecting Desaturate > color to gray.
Using the clone brush and smudge brush I go around correcting any hard edges on the texture. Use the smudge and blur tools to smooth out the edges. This gives the image a… yeah you guessed it, smudged look. This might be fine for a painterly stylized character but I want to keep some of the original roughness of the texture. I use the clone brush with a low opacity to bring some texture back into the smudged areas.
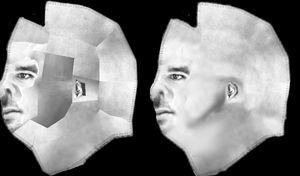
Other tools of use are the Dodge tool to lighten areas, and the burn tool to darken them. You may also want to play around with the brush Mode. Set it to overlay and a low opacity when introducing some texture to a blurred area.
Using Blenders texture paint tool to clean up the texture
Bringing the image back into Blender I apply it to my model in the shading tab. Moving over to the texture paint tab I once again used the smear brush and clone brush to correct any hard lines that appear where the models' seams meet.
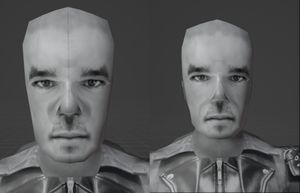 After editing be sure to save the image by going to the UV editor tab, selecting image and then save.
How to recolour an image in Gimp using the Colorize tool
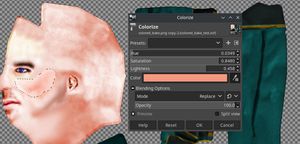
I open the image in Gimp once again and duplicate the base layer. Now using the selection tool I select a section of the image I want to recolour. Once selected I can expand the colours menu option and select colourize. It can help to add feathering to the selection to maintain soft edges for skin tones.
The Final steps: rendering the image
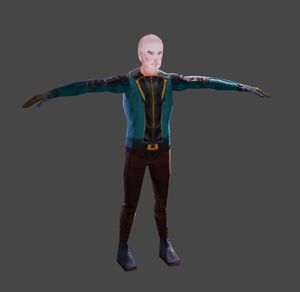
The next step is very dependent on what style I’m going for graphically. To turn this into a late 90s-era crisp pixelated character I can click on image > image size and set it to 256x256 or even 128x128. In the Blender shading tab, set the image texture interpolation to closest neighbour.
Alternatively, I could make the texture high resolution and even add normal maps, etc. But my goal was an easy way to make quick easy textures for a simple low poly graphics style that still looks good.
Thanks for reading! And if you are interested in The Flight of Ajax please sign up for the beta :)
More in this series
- Building Ajax: The simple and effective technique I used to create character textures in The Flight of Ajax

